Sunday, 5 December 2010

Thanksgiving aka Happy Nut Roast day.

Last weekend the American Vegetarian and I celebrated our 4th annual Thanksgiving feast with friends. Every year on the last Saturday in November we invite friends over and cook a vegetarian Thanksgiving dinner.

When the American Vegetarian first moved over, Thanksgiving was one tradition that I definitely wanted to incorporate in our lives, and we're so glad we did.  I absolutely love it. We try and invite different people over each year so all of our friends can experience our Thanksgiving. If we had a table big enough we'd invite everyone we know.

Now never having gone too, or eaten a Thanksgiving dinner myself it was up to the American Vegetarian to tell me what the dinner consisted of. Obviously turkey was out of the question so we substitute that with nut roast. The rest of the menu goes as follows; Sweet potato casserole, mashed potatoes, green bean casserole, corn on the cob, stuffing, and pumpkin pie. We start the evening with cheese and biscuits and end with the classic pumpkin pie. In between all the food, copious amounts of wine and champagne are drunk.

The one dish which I had no idea how to cook, or even heard of before was green bean casserole. The American Vegetarian described it as green beans with mushroom sauce and fried onions. It didn't sound particularly appetising and when I looked on line to get some recipe ideas, the ones I found seemed even more unappetising (have a google yourself and you'll see what I mean). Recipes that entailed mixing canned cooked green beans with fried onions and milk before baking in the oven for 30 minutes!!! Why bake cooked green beans? I imagine they would be soft and pretty tasteless after that.

So I thought I would create my own version of the classic American dish of green bean casserole. I think my version is good, and all who have tasted it have always asked for seconds.

Ingredients (Serves 8)

600 grams of fresh green beans.
300 grams chestnut mushrooms.
1 can of condensed mushroom soup.
400 grams of crispy fried onions.
a good handful of fresh parsley; chopped.
a knob of butter.
salt & pepper.

Wash, trim and cut the green beans in thirds, set aside. Next wipe the mushrooms clean with a cloth. Because mushrooms soak up water it is best not to wash them. Just wipe the mushrooms and then slice them. In a pan melt the butter and then add the mushrooms, and saute for about 5-10 minutes, until the mushrooms have released their juices and cooked. Instead of letting the water cook off, I just pour it away. Next add about 3/4 of the can of condensed mushroom soup, and mix well. Season with salt and pepper.

Add the parsley and the uncooked green beans. Season and mix well. Add the mixture to an oven dish. I use one which is just under 2 inches deep. Cover with foil. Bake in a preheated oven for 40 minutes at 180 Celsius. Thirty minutes into the cooking time take the dish out and add the fried onions to the dish, recover with the foil and place back in the oven for the final 10 minutes. You don't want to add the onions at the beginning as they will burn. So adding them to the final 10 minutes of cooking is just fine.

I always prepare the dish early in the day and then when the guests arrive cover with foil and bake.

Serve with a thanksgiving meal.

Thanksgiving is always a feast in our home. A feast of food, friends and fun times.

Tuesday, 23 November 2010

Masterchef Live


So last week I went to Masterchef Live at Olympia. I was so excited and just had the most wonderful day. The American Vegetarian and I decided to cycle their, which I didn't mind as we cycled to Olympia when we went to the yoga show and I quite enjoyed the journey. The journey this time however was windy and so the resistance I felt from the wind made a 45 minute journey turn into over an hour.

Windswept and excited we headed straight away to a cook off between Lisa Faulkner and Dhruv Baker. I love Dhruv, I love the way he has fusioned his upbringing into his food I feel a certain pull towards his food. Dhruv made some green beans with mustard seeds and coconut and Lisa made a fish pie.

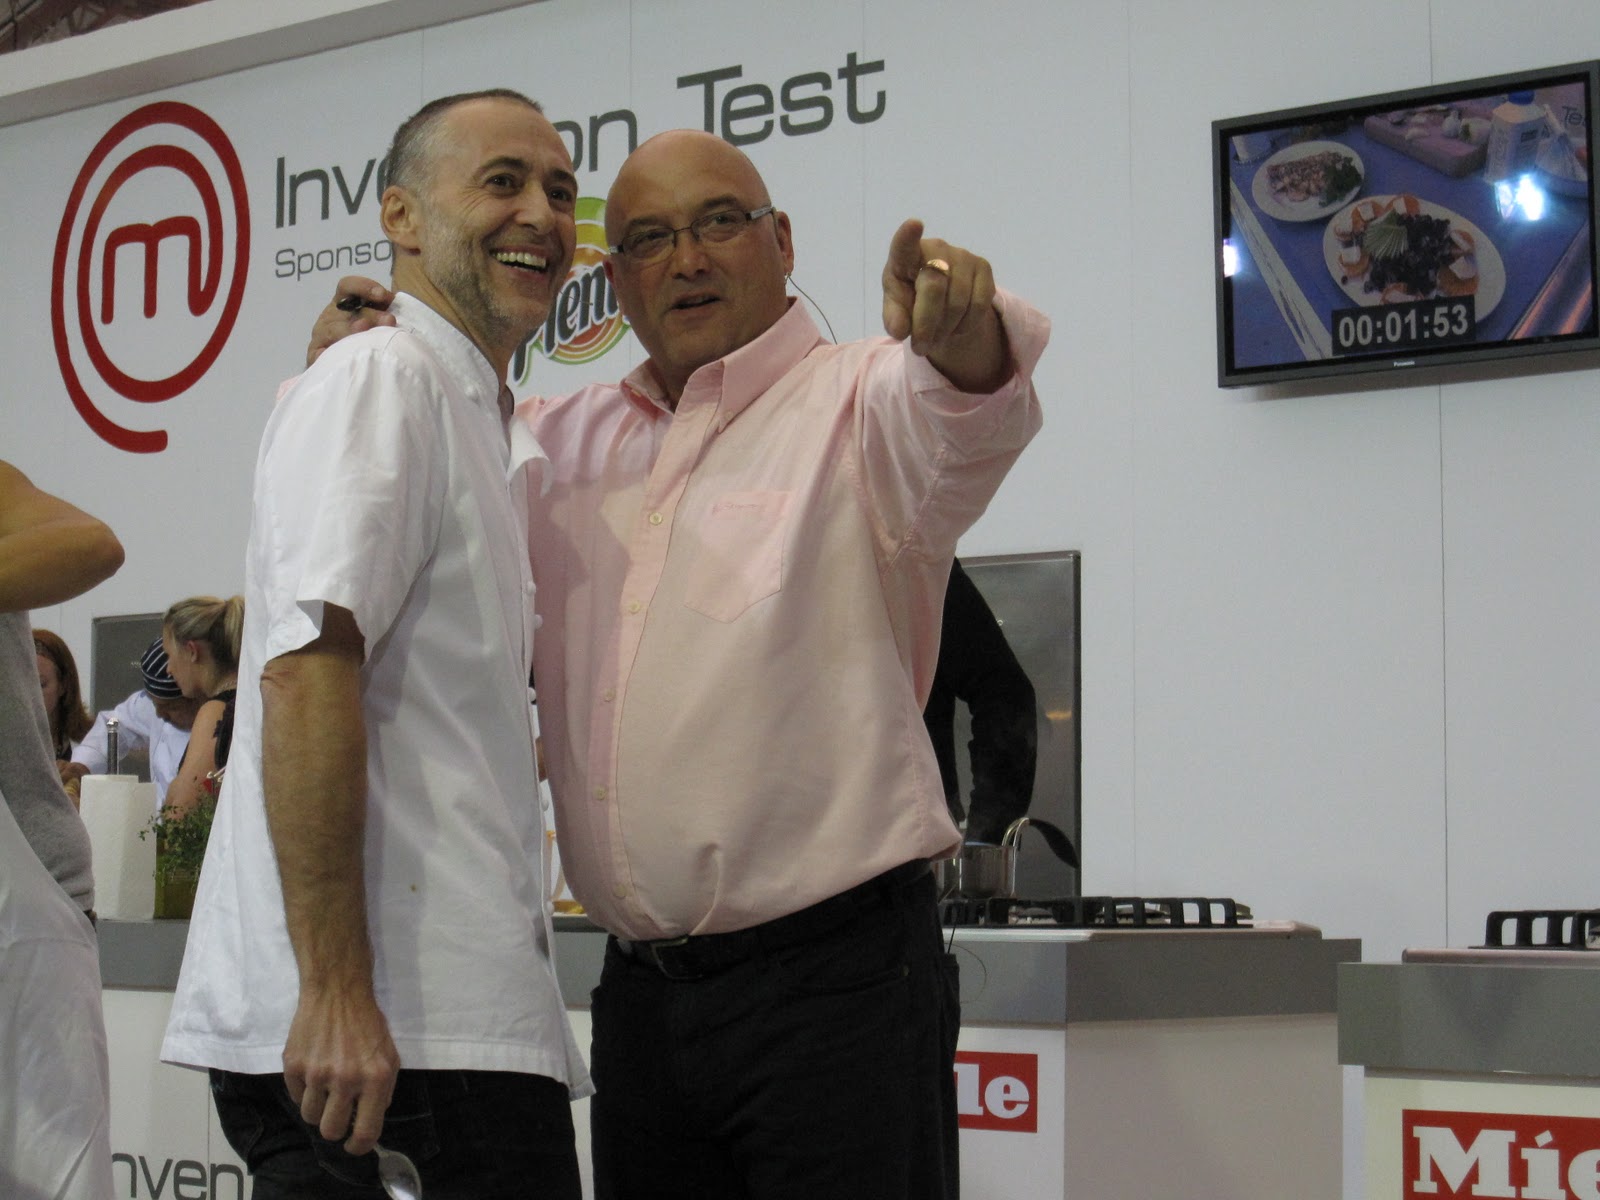
After that we went to check out the Invention Test. Which is where around 20 or so non professional people pay £60 to make a dish from ingredients given to them and then these are tasted by Michel Roux and Greg Wallace They all had the same ingredients, which consisted of some fish, lemon, goats cheese and chestnut mushrooms. They also had free range of everyday store cupboard essentials, like pasta, rice herbs etc. The dishes that were made ranged from, risottos and pasta. All of them were judged by the 3 finalists of the professional masterchef's and then 3 were chosen for Michel and Greg to taste. On paper I was interested in doing the invention test but given the ingredients they got I'm not sure what I would have made, seeing as I don't cook any non-veg food. A fish pie won, which was remarkable seeing as they didn't have an oven.

Next on the agenda was lunch!! Now they had this 'restaurant expirience' section, where you could buy lunch from restaurants like Cafe Spice Namaste, Luxe, Malaysia Kitchen and some others as well. I was a bit disappointed at the lack of vegetarian options available. We bought all the vegetarian options available that day, which consisted of 3 dishes out of a possible mmm I suppose around 20. Some restaurants didn't have a vegetarian option available, which I think is a bit poor. So we had some amazing Roti Canai from Malaysia kitchen, a lovely Indian tapas of pani puri, bhel puri, beetroot samosa and a spring roll, with tamarind sauce from Cafe Spice Namste, and some penne pasta with mushrooms from Theo Randell. The tapas, and roti canai were just amazing, light, fragrant and very tasty. The pasta, was well pasta. For dessert we had the most amazing blueberry cheesecake with lemon curd from Luxe. OMG, is all I can say. Pure utter heavenly delight.

So after lunch we made our way through all the different stalls, and tried as many things as our stomachs would allow, dips, chocolate wine, soup, crisps, liquor, cheese, toffee vodka, beer, more dips. It got to the point that we were turning down free food as we were so full, however the liquor kept flowing!. There was so much to try and so much to buy. I bought some amazing aubergine chutney from Purity Trading. It is so tasty its practically gone. We also bought some amazing liquor from Wales. One thing I was wanting to buy myself was a good knife. And I did I went to about 4 different knife stalls and decided on the Ziganof. Oh how I love it, it has changed the way I chop. Everything cuts like soft butter. The tops of my fingers however are a little worse for wear.

Also attached to Masterchef was The Wine show, where we tried a lot of rioja! My highlight though was winning a Masterchef mug from Andy Peters. How? By being the first to get the answer right. If only I did that at school!

Wednesday, 27 October 2010

I *heart* Jamie


I am lovin Jamie's 30 minute meals. I think he has some fantastic simple ideas and I can't praise him enough. I haven't tried an entire Jamie's 30 minute meals yet, as they usually contain a meat/fish main course, but I have made four sides. The sweet potato mash, baked mushrooms, beetroot salad and the french peas. So here are the recipes for the last two. I made them both last night, and found it very quick and easy, and something that you can so easily put together even if you're totally knackered after a days work.

Beetroot salad

Ingredients

1 bag of cooked vacuum packed Beetroot ( I chose ones which were not in vinegar)
1/4 of a block of feta cheese
a good handful of flat leaf parsley
1 tablespoon of olive oil (Jamie uses two tablespoons)
1 tablespoon of balsamic vinegar
salt and pepper
squeeze of lemon juice.

Method

In a food processor coarsely grate the beetroot, then add the salt and pepper. Beetroot are like tomatoes, they love salt it really brings out the flavour in them. Then add the balsamic vinegar, olive oil and lemon juice. Give it a stir or as Jamie says 'move it around a bit'. Then cut the parsley and add that. Check and adjust the seasoning. Spoon it all on a plate and crumble some feta cheese on top.

Jamie's French peas

OK so this is Jamies' version of a French classic. All I know is that it is really tasty and another quick and easy side dish to make.

Ingredients.

1 bag of frozen peas
2 bunches of gem lettuce
6-8 leaves of mint
1 tablespoon of flour
a knob of butter
300ml of vegetable stock (Jamie uses chicken stock)
squeeze of lemon juice
salt and pepper

Method

Wash and chop the lettuce. Add the butter and the flour to a pan and then add the vegetable stock. Whisk this so there are no lumpy bits left, and it becomes a smooth bubbling sauce. Then add the mint leaves and the bag of peas. Next add the chopped lettuce and put the lid on for 5 minutes. Finally add the lemon juice and season with salt and pepper.


I will make an entire 30 minute meal and blog on it, but for now I hope you enjoy these sides as much as I have. These recipes are from Jamie's 30 minute meals

Thursday, 21 October 2010

Figs, mozzarella and basil salad.

Earlier this year my lovely friends and neighbours Pat & Viv got me the River Cafe Cook Book Green for my birthday. And on Friday night we finally managed to get together so I could cook them dinner with recipes from the book.

I love Italian food. It's so different from Indian food, and I love them both equally. Indian food is full of many different spices and done well, you can taste the layers of spices in the food. The earthy cumin, to the spicy chilli powder, to the fragrant coriander. Italian food I feel is the opposite, no spices but simple and good quality ingredients.

Now because the quality of the ingredients is vital in Italian cooking, instead of popping down my local supermarket to pick up my groceries I went to Whole Foods.

For starters I made a figs, mozzarella and basil salad with a lemon and olive oil dressing. It was simple and glorious. Usually when I cook from a recipe, I sometimes adapt it and make it my own, but I felt I had to commit to the recipes in this book because they are quite precise. And I (and my guests) were glad I did. Now I know there isn't much to adapt in this particular recipe, but I'm just saying that committing to a recipe is worth it.

This is a great starter. Light, tasty, and oh so delicious. I highly recommend buying good quality ingredients for this, it really pays off. So here it is for you to try.

Ingredients (Serves 4)

8 figs. (They should be slightly soft, so they give to pressure)
A big ball of good Mozzarella
A big handful of fresh basil
Maldon sea salt and pepper
Juice of 2 lemons
Extra virgin olive oil

Method

Wash the figs and cut the top of the stem. Cut each fig through its stem in half and then into quarters. Pick the basil leaves off the stalks and then wash and pat dry with a kitchen towel. Tear the mozzarella into halves and then quarters.

Place the figs and mozzarella pieces on to individual serving plates. Scatter the basil leaves over and season with salt and pepper.

Mix the lemon juice with three times its volume of extra virgin olive oil. Season. Pour over each plate and serve immediately.

Seriously good stuff.

This recipe is taken from River Cafe Cook Book Green, by Rose Gray and Ruth Rodgers.

Monday, 11 October 2010

Curly Kale Risotto

The season's are changing and I'm beginning to make hearty warm autumnal food. Food that warms you up from the inside. Risotto is one of these dishes. I absolutely love a good risotto with a large glass of red wine. Magnifique!

Now I first learned how to make risotto form Giuseppe. An Italian who knows his food (mind you what Italian doesn't?). He owns this fantastic little gem of a wine bar in Notting Hill called Negozia Classica. It serves all things Italian and is the best place to go for a good glass of wine. You can sit by the fireplace or in the window seat and watch the streets of Notting Hill go by whilst consuming some delicious wine. I highly recommend you give it a visit.

Anyway one year on his wife's birthday (my very good friend Goldy) he showed me how to make mushroom risotto like the Italians do. It was so good, I had never tasted risotto quite like it. It was so creamy and heavenly, every mouthful took me directly to the streets of Rome.

Now this isn't Giuseppe's recipe but I have stuck to his structure.

Ingredients

300 grams Arborio rice.
2-3 shallots, peeled and sliced
200 grams of curly kale (sliced, or buy already sliced)
1 litre of vegetable stock
some olive oil
a knob of butter
some Parmesan
black pepper.
a glass of white wine (optional)

Method

First prepare your curly kale. Wash the kale and heat some butter in a large frying pan, then add the kale and saute it for about 5 mins until it has all wilted. Set aside. Then make your vegetable stock according to the packet instructions. I use Marigolds Swiss Vegetable Bouillon. Its the best vegetable stock out there. I heat a litre of stock on the hob and have it ready for the risotto.

Then in a big pan heat some olive oil and saute the onions until they become translucent (approximately 5-8 minutes), then add the rice. Its very important that the rice becomes covered by the oil. So mix this up really well for a few minutes until you see the rice become slightly translucent. Now if you're using white wine, this is when to add it in. So add the wine and cook until all the wine has been absorbed by the rice.

Now add the vegetable stock, one ladle at a time. Turn the heat down to a simmer and keep adding the stock one ladle at a time and continuously stir the risotto. Its very important that you keep stirring the rice as this is what brings out the creamy starchiness of the rice and why risotto looks creamy. Only add the next ladle once the previous ladle of stock has been absorbed by the rice. Keep adding the stock and stirring the rice for approximately 20-25 minutes until the rice is cooked. The rice should be soft with a slight bite.

Now at around 18 minutes into the stirring add the wilted curly kale, leave a handful aside to garnish the finished product. Keep stirring the rice and if you find that you run out of stock before the rice is cooked then just add some boiling water.

Once the rice is cooked take off the heat, and let it sit for 2 minutes with the lid on before serving. Once on the plate season with some black pepper, some grated Parmesan and garnish with some extra wilted curly kale.

Added extras: If you want to give your risotto a creamy buttery taste, then once you take it off the heat stir in some grated Parmesan and some butter. This is completely personal preference but I guarantee you will love it!!!

Buon appetito.

Monday, 4 October 2010

Pizza and a Movie?

Home made pizza is such a joy. I really enjoy making pizza. I find it quite therapeutic. Making the dough, preparing all the toppings and then placing them on the pizza to your own taste.

I usually make roasted vegetable pizza, and I use passata to make the pizza sauce. I find passata makes a lovely thick sauce as it has very little water in it, as opposed to a can of tomatoes. I have to say the last one I made was really tasty. Now in this recipe I haven't made the pizza dough from scratch. I used a 'just add water' mix. I think that is fine and I still categorise this has being home made.

So here is my recipe for you to try:

Ingredients

3/4 carton of Passata
1 clove of garlic (made into a paste)
Good handful of basil leaves (torn)
1 pack of pizza base
some water

Toppings

1 large aubergine
2 courgette
2 red or green peppers
1/2 red onion (sauteed)
Sweetcorn kernels (boiled if cut from cob)
Pineapple chunks (optional..American Vegetarian loves pineapple on pizza)
Jalapeno peppers (chopped)
Mozzarella
Some olive oil
Salt & Pepper to taste.

Method

Pre heat oven to 190 C. Cut the aubergine into discs, the courgettes in half and then sliced length ways, and the peppers deseeded and cut into quarters. Put them in a bowl and season with salt and pepper and olive oil. Then layer them on a baking try and roast for about 30-40 minutes, turning half way.

While this is happening, you can make your pizza sauce. Peel and chop the garlic then with the back of a knife just keep crushing the garlic so it becomes paste like. Heat some olive oil in a pan, add the garlic and the torn basil leaves and fry for about 1 minute then add the passata sauce. Cook on a medium heat for about 20 minutes until the sauce has become the consistency you require. In another pan heat some olive oil and fry off the onion for about 8 minutes until they become soft and translucent, then set aside.

Now make the pizza base according to the packet instructions. Usually you just add 4fl oz of water, and make into a soft dough then need for about 5 minutes. Then roll out the pizza base in either a traditional circle or as I did a rectangle. You get a bigger pizza plus it fits my baking tray perfectly.

Once you have all your other toppings prepared. Spread the pizza sauce on the pizza base and then get the aubergine, courgette and peppers and tear them and place evenly on the pizza, then add the sweetcorn, onions, jalapenos, pineapple (optional), and finally tear the mozzarella and dot around the pizza. Cook in the oven for 15 - 20 minutes until the pizza is cooked.

Some handy tips; if you find the pizza base not as crispy as you would like, then before you put the toppings on just bake the base for about 5 min's beforehand. I didn't have to do this, as the baking tray I used had holes in it, so the base was nice and crispy.

Grab a mate or partner, a DVD and bottle of wine and enjoy a great Friday night in!

Monday, 27 September 2010

What to do with Swiss Chard?

Is what I always think when I get Swiss chard in my veg box. I love receiving my veg box, because I get to cook food I normally wouldn't buy. Swiss Chard is a green I'm just not really sure what to do with. Once I just curried it, the same way I would make spinach curry. It was lovely and had a slightly denser taste than spinach.

I didn't want to boil, steam or stir fry it, so I decided to make Swiss chard quesadilla.

These are a fab fun meal to have. I've never made quesadilla before but I knew in my head exactly what I wanted, so I made it come true. And it got the thumbs up from the American Vegetarian as well.

Ingredients (makes 3 quesadilla)

A bag of Swiss chard
1/2 red onion; sliced
1 clove of garlic; chopped and crushed into a paste
1 can of black beans (drained)
Any cheese of your choice ( I used Red Leicester) grated
2 fresh tomatoes (de-seeded and chopped)
6 soft flour tortilla
some olive oil
salt & pepper to taste
Some spray oil.

Method

First prepare your Swiss chard. Wash and chop the chard. Now the way I wash my chard is by giving it a bath in the sink as opposed to rinsing it under water. This way all of the mud from the veg box has defiantly been washed away. I do this twice. You can see from the colour of the water when the Swiss chard is clean. Chop the stems and roughly chop the leaves. Set aside.

Make the garlic paste. To do this just peel a garlic clove and chop quite finely, then add a little bit of salt and with the back of your knife crush it. The salt prevents the garlic from slipping away. Keep crushing it with the back of your knife until the garlic is paste like.

Now heat some oil in a pan and fry the sliced onion and garlic paste then add the Swiss chard and season with salt & pepper. Cook until wilted for about 5-7 minutes. Set aside.

Now prepare your other ingredients. Chop and de-seed two fresh tomatoes, so you have some nice small squares, drain and rinse one can of black beans and grate your cheese.

Then prepare the tortillas. I should point out that when you add the ingredients to your tortilla make sure you leave about an inch space between the edge of the tortilla and the filling.

Now get one tortilla and sprinkle some cheese on it, then add the Swiss chard, then the black beans, then some tomatoes, then some more cheese. Season with salt and pepper and top with another tortilla.

In a big frying pan (big enough for your tortilla to sit) spray some spay oil and add the entire tortilla to the pan. Let it cook for about 3-4 mins until browned to your liking then before you turn it over spay some oil on the tortilla and then very carefully turn it over and cook for another 3-4 minutes. You might find some of the filling fall out but it doesn't matter.

Then slip it on to a plate, cut in quarters and enjoy!

If you have any ideas what else to do with Swiss chard then please let me know. Your opinion on this recipe and my new look blog is very much appreciated.